Hello, welcome to halyconstudio school day! Haha! Kidding..
Well here are some useful tips for the noobs out there who doesn't have any photoshop skills at all. First, of course you gotta identify the available functions on the panel and shortcut as well. If you that this software is too hard for you, Nah~~ You're wrong because it is really as simple as 123. Nevertheless, the filters are there for u to re-touch your photos. For web developers (starters), maybe you need some creativity to blend some effects on the photos.
Okay, lets start on Lesson1.
What are you going to do with your photos once it's ready?
Emboss it? or maybe as simple as resizing it? Let's take for example...
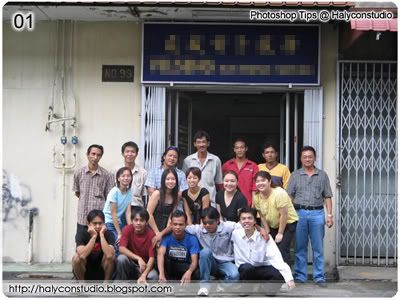 This is a normal unedited photo.Well, I pixelize the banner for some reasons :)
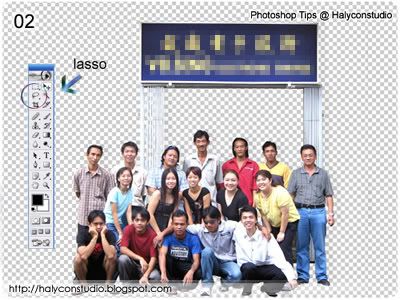 The lasso tool act as the main component at this stage.Crop all possible space that you need for future designs.
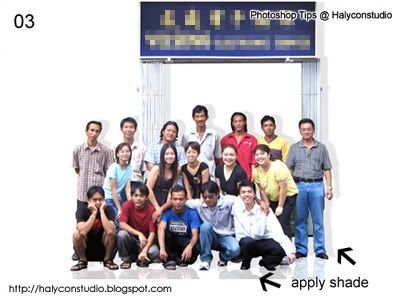 Now, if possible put some shading for a reflecting effects.On the toolbar, go to Windows > Select Layers. The layers act as a timeline and levels of image prescription (arrangements). See the next image for more instructions.
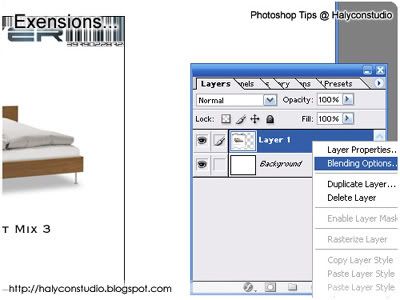 This is the Layer pane. The left side is the image that I will make an edit.Same as the shadow, I will do some fading effects / alpha blends.
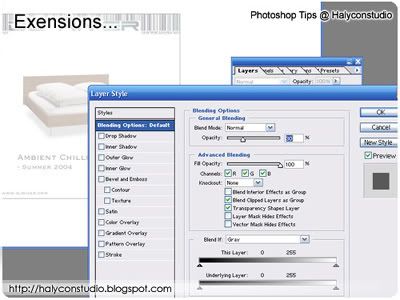
Continue from 03, to put shading, copy the same layer again (DUPLICATE LAYER) and on the toolbar again, go to Image > Rotate Canvas > Flip Canvas Vertical (topeng) and you got a duplicate copy of the main picture. Now on this layer, right click and select on Blending Options. The Opacity (alpha blends) will set to 30 for more fading look. These will apply to the shadows as mentioned on 03.
 Now that all possible effects are done, apply some coloured lines for your design.Put a few text lines for conveniency look or feel.Noticed that there is a speeding white lines before the alphabet C.That would be blurred motion features under your toolbars .. Filters > Blur > Motion Blur.
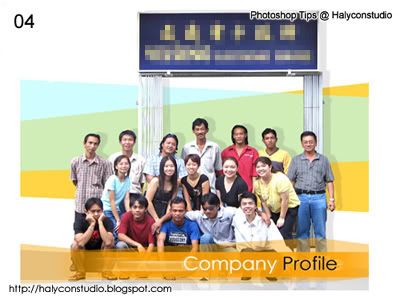
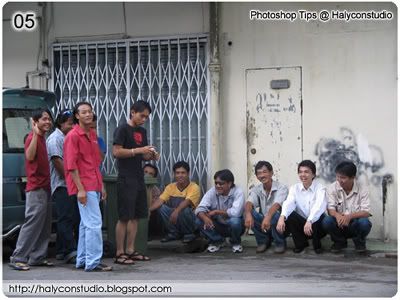 Now here is another unedited picture.Looks dull right? Maybe I can apply a dual combination of retro and tempo glance on the theme.Less glassier in other terms.
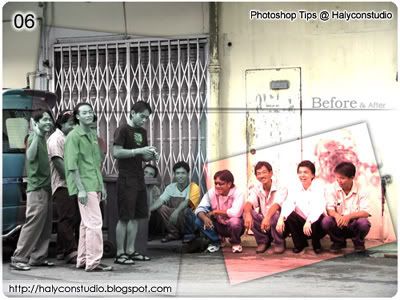
These are the effects before and after.As usual, I applied the same thing, layers plays an important role here.Toggle CTRL + mouse on the Lasso tool and draw a rectangular box on the right. Then, CTRL + C to copy the original image and CTRL + V to paste again. By right, there should be a second layer on the image but only the slected portion (Lasso tools) you've done earlier on.Again, use the blending options for shadings, colour tone and brightness. That might help!And that's it for today's lesson. Hope you enjoyed it.
Don't just sit there and listen, trying yourself is one good explorable experience. =)